How to configure okey proxy with Octoparse Scraper
Octoparse stands out as a powerful web scraping tool, excelling in its user-friendly interface and robust functionality. Its intuitive point-and-click operation enables users to scrape data from complex websites without coding expertise effortlessly. Octoparse supports diverse data extraction tasks, offering features like templates, cloud extraction, API integration, and scheduled scraping for automation. In terms of service, its responsive customer support and extensive online resources ensure a smooth user experience. Pricing is competitive, providing flexible options for beginners and advanced users. Compared to competitors, Octoparse's versatility and cost-effectiveness make it a preferred choice for businesses seeking efficient and reliable web scraping solutions.
Today I will show you how to configure okey proxy with octoparse in detailed steps.
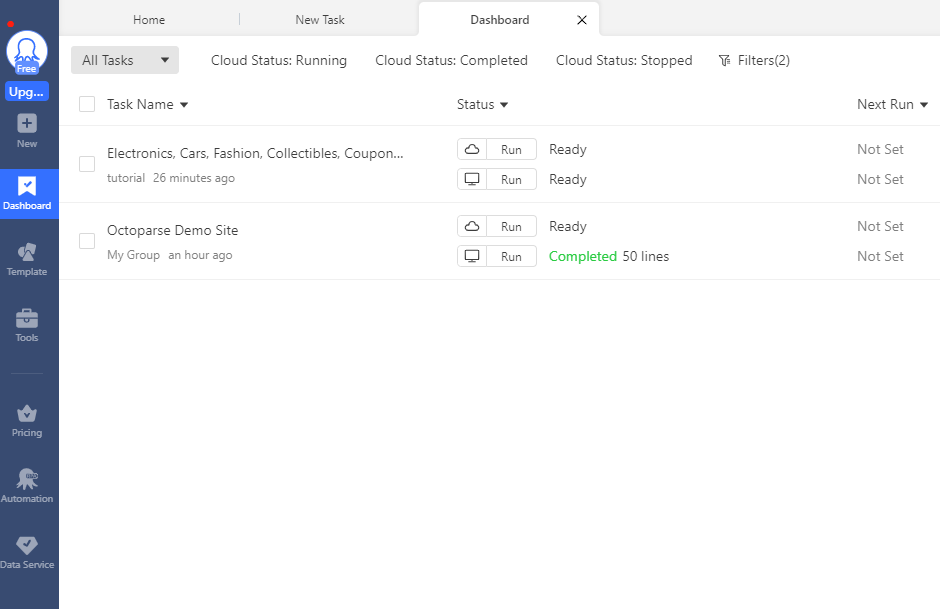
1. Download Octoparse, Open the client, and come to the dashboard of the client as the following screenshot:
2. Click “new”, and go to “custom task” to create a new task.
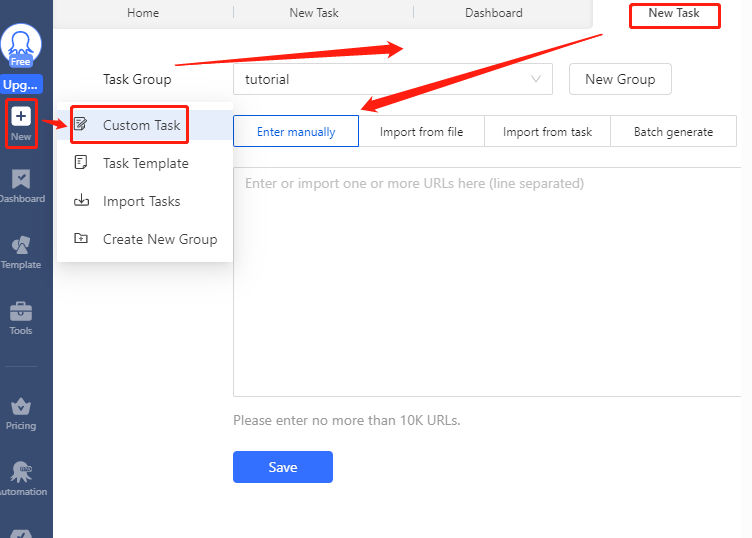
3. Enter the Scraping URL and save it.
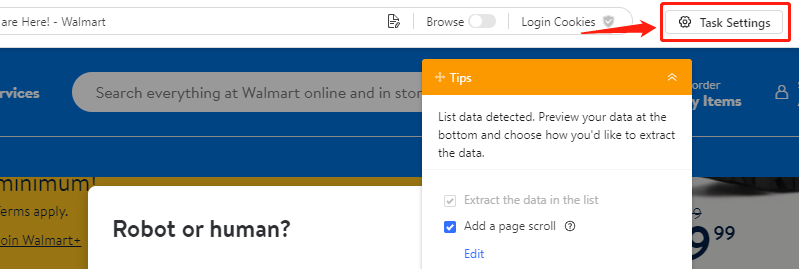
4. Find “Task Settings” and click it.
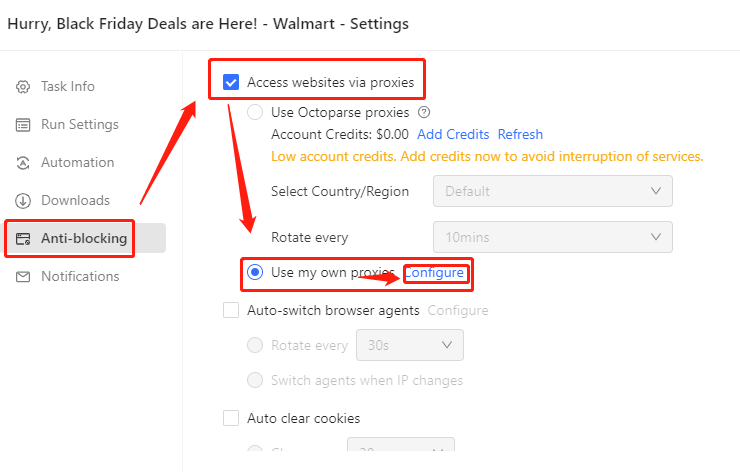
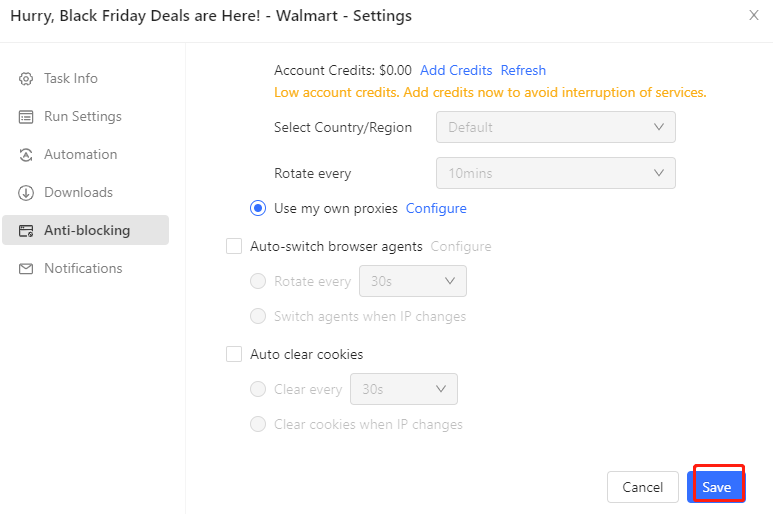
5. Enter into "Anti-Blocking", and click "Access websites via proxies" -> "Use my own proxies" -> "Configure".
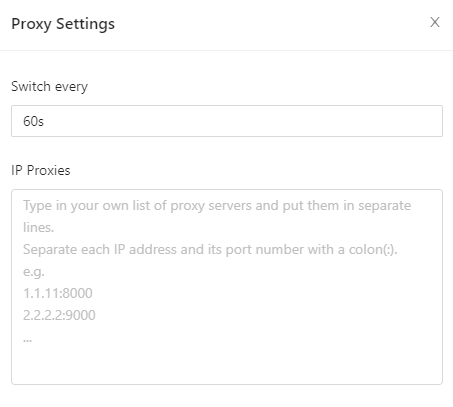
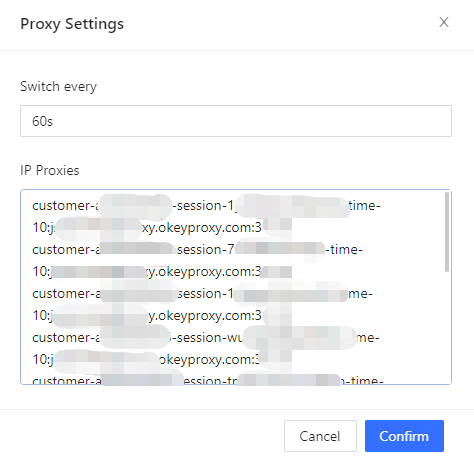
6. Do the right proxy Setting. a. Here we need to set Switch Time From 1s to unlimited seconds. The default time is 60 seconds. b. Get IP Proxies From Okeyproxy.
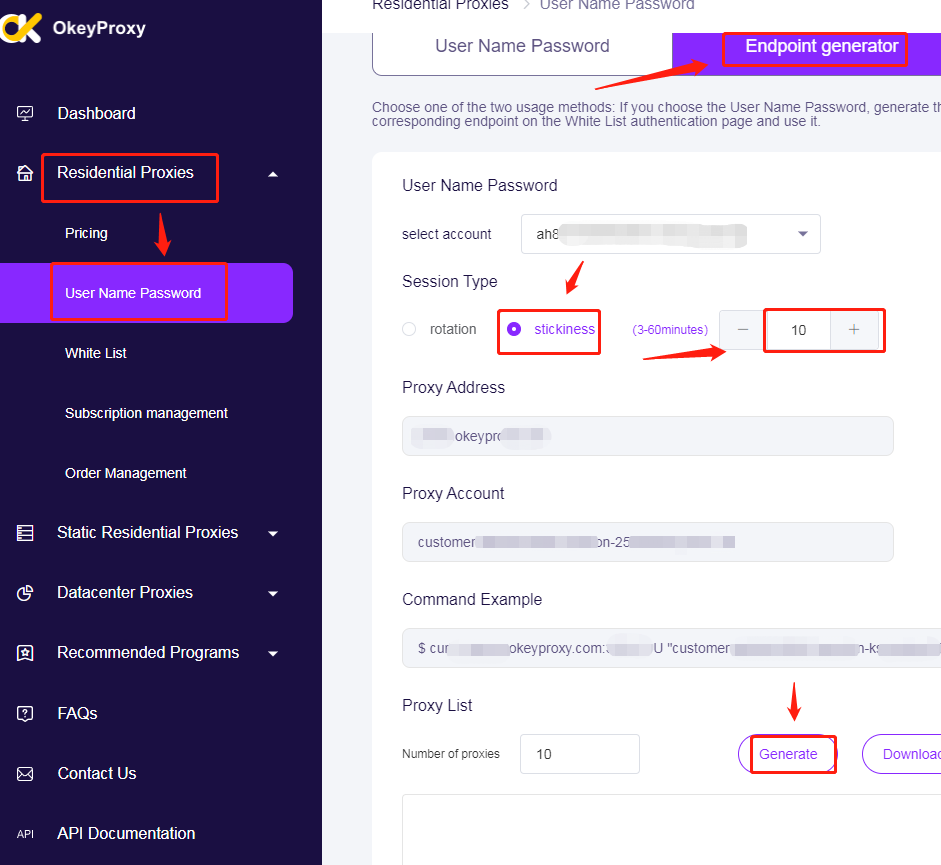
7. Generate IP proxies from Okeyproxy, and copy them, steps as follows: a. residential proxies -> User Name Password -> Endpoint Generator -> Stickness -> 10(or more) ->Generate.
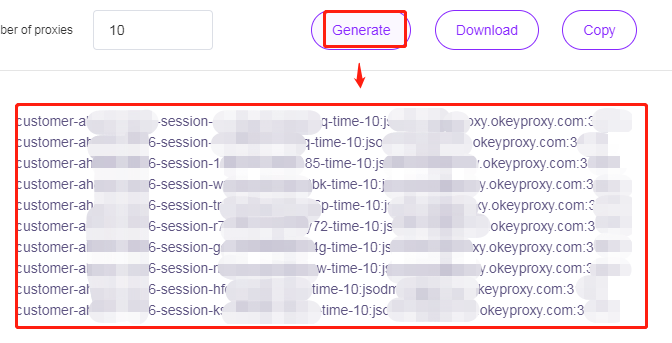
8. After Generate, Get 10 different stickiness IPs as follows:
9. Paste IPs into “IP proxies” in the Octoparse Proxy setting.
10. Lastly, save the task.
You can also view our Youtube Video as follows:
https://www.youtube.com/watch?v=CtdEMTOVzp8


