The proxy ecosystem has tons of useful utilities that make working with proxy settings a breeze. A great instance of these utilities is a proxy management tool, FoxyProxy is the most popular choice for this toolset.
This article will help you to understand the functions and features of FoxyProxy extension, Foxyproxy download, and how to use FoxyProxy Chrome and Firefox&.
Was ist FoxyProxy?
FoxyProxy is an advanced proxy management tool available as an extension for Google Chrome, Mozilla Firefox, Microsoft Edge, and other Chromium-based browsers. It is widely used by developers, IT professionals, and privacy-conscious individuals who frequently work with proxies. It simplifies the task of managing and switching between multiple proxies, making it a valuable tool for those who prioritize online privacy and security.
Ist FoxyProxy sicher zu benutzen?
Sure, it is safe to use. No security or fraud incidents have been reported. The company was founded in 2006, and since then, its popularity and number of services have continued to grow. They value transparency; thus, you can find more useful information about the team behind FoxyProxy on FoxyProxy’s website. Besides, there are countless reviews online that can help inform how secure it is. Btw, it’s better to do your research and trust your experience. And we recommend you OkeyProxy as the best proxy provider for its comprehensive performance.
Welche Vorteile bietet FoxyProxy?
It is packed with features designed to make the process of working with proxies as seamless as possible. Here are some of its key features:
1. Pattern-based Proxy Switching: This feature enables you to define patterns for the URLs you visit. You can then assign different proxies to different patterns. Consequently, when you visit a URL, it automatically routes your traffic through the appropriate proxy based on the patterns you’ve pre-defined.
2. Multiple Proxy Support: It supports multiple proxies, allowing you to easily switch between them. You can add, delete, enable, or disable proxies with just a few clicks.
3. Color Coding: To help you quickly identify different proxies and patterns, it uses color coding. You can assign different colors to different proxies or patterns for easy identification.
4. Import and Export Settings: This feature allows you to import and export your settings. This is particularly useful when you need to use the same configurations on multiple devices or share your settings with others.
5. Logging: It provides detailed logs of all your proxy activities. This feature is beneficial for debugging and tracking purposes.
6. Proxy Auto-Configuration (PAC) Files: It can generate PAC files based on your current proxy settings. This feature allows you to use the same settings across different browsers or devices.
Empfohlene Proxy-Lieferanten: Okeyproxy - Top 5 Socks5 Proxy Provider mit 150M+ Residential Proxies aus 200+ Ländern. Holen Sie sich jetzt 1 GB kostenlose Testversion von Residential Proxies!
Youtube Video Anleitung ist wie folgt aufgelistet:
Wie benutzt man FoxyProxy für Chrome?
Die ersten Schritte mit FoxyProxy sind die Installation der Erweiterung auf Ihrem Browser, danach können Sie beginnen, Proxys hinzuzufügen und Muster zu definieren. Hier finden Sie eine Schritt-für-Schritt-Anleitung für die Einrichtung:
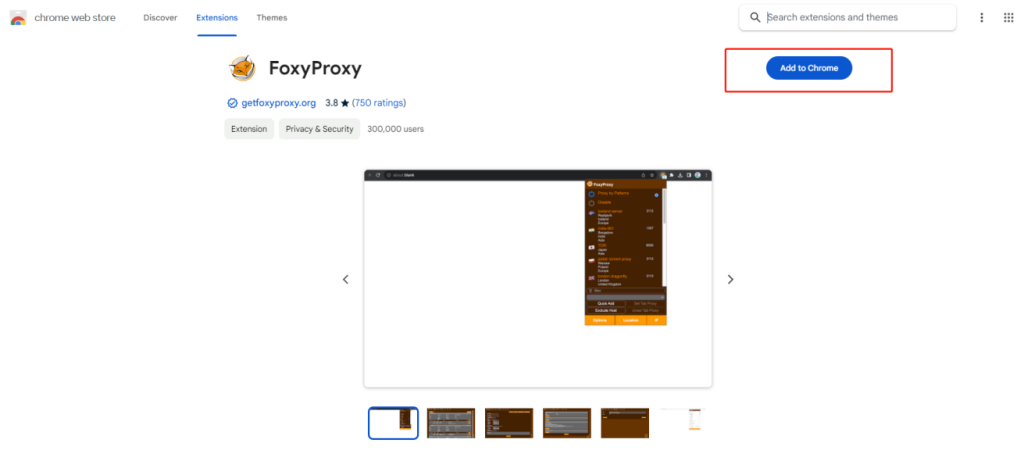
Schritt 1: Laden Sie die Erweiterung herunter und installieren Sie sie.
Gehen Sie zunächst zum Chrome Web Store und suchen Sie nach FoxyProxy. Klicken Sie auf die Schaltfläche "Zum Browser hinzufügen", um die Erweiterung zu installieren.
https://chromewebstore.google.com/detail/foxyproxy/gcknhkkoolaabfmlnjonogaaifnjlfnp
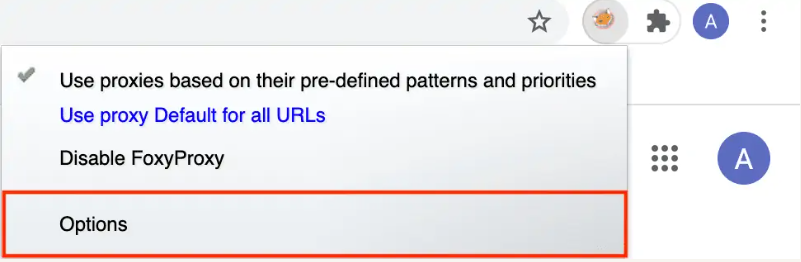
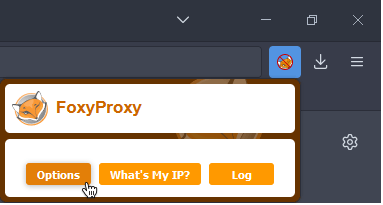
Once installed, click on the small icon in the upper right menu and then click on Options. This will open a new window.
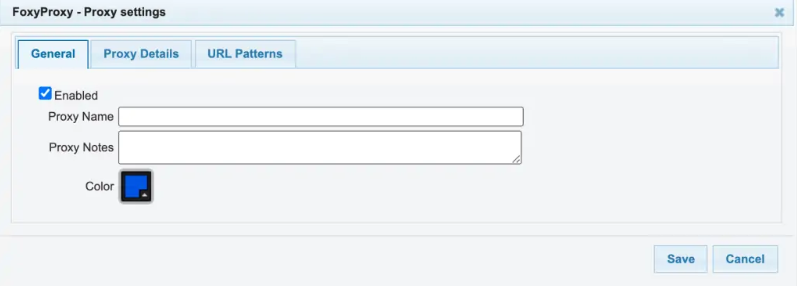
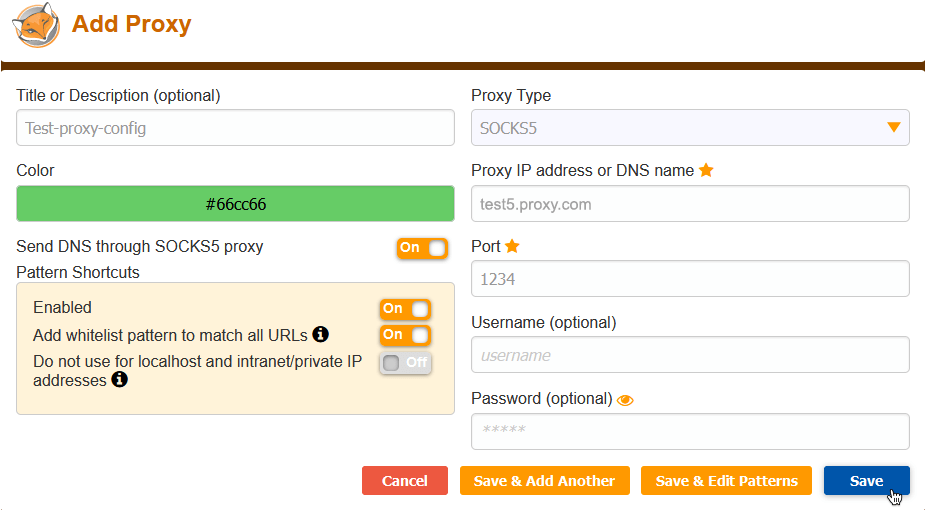
Schritt 2: Add Proxies. In the ‘Proxies’ tab, click on ‘Add New Proxy’. This menu may look a little intimidating if you’re not used to manual configuration, but don’t worry because it’s pretty simple to use.
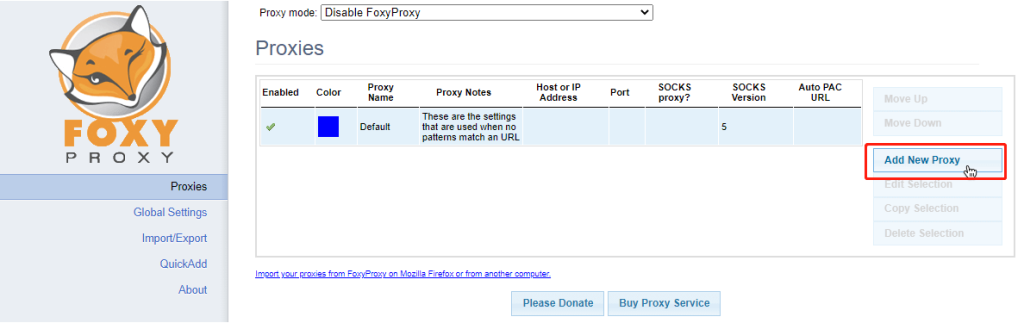
Here, you need to enter the details of your proxy server, including the IP address and port number. You can also assign a favored color to this proxy for easy identification.
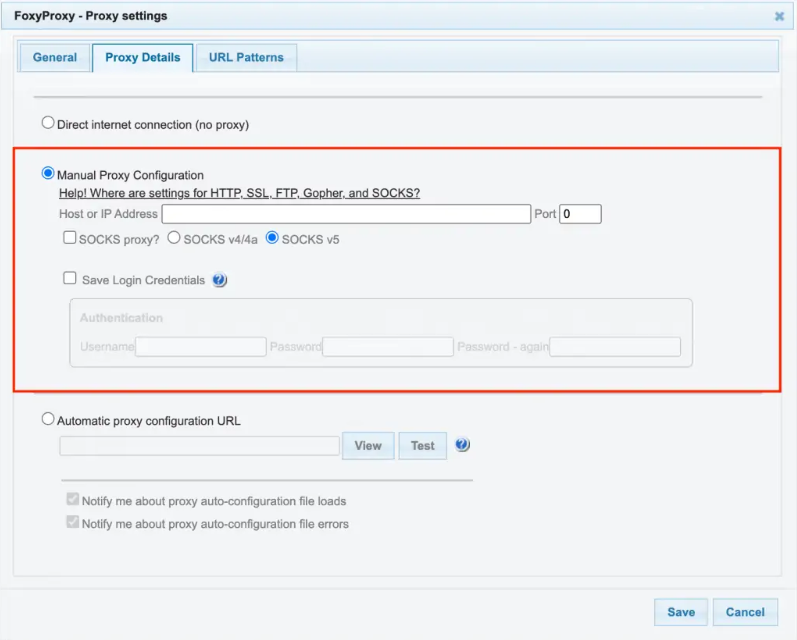
Schritt 3: Wählen Sie auf der Registerkarte Proxy-Details die Option Manuelle Proxy-Konfiguration und geben Sie die Proxy-Server-Informationen ein.
Die URL für die automatische Proxy-Konfiguration ist sehr nützlich, wenn Sie sich in einem verwalteten Schul- oder Arbeitsnetzwerk befinden. Sie konfiguriert den Proxyserver, ohne dass Sie etwas tun müssen.
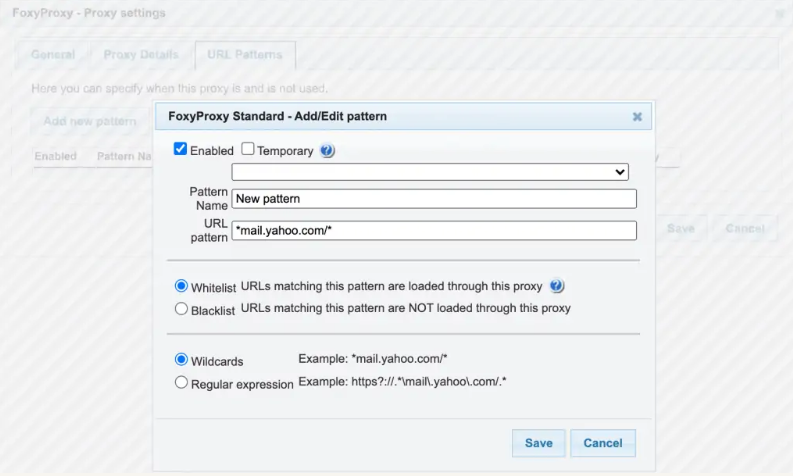
Schritt 4: Define Patterns. Now navigate to the ‘URL Patterns’ tab and click on ‘Add New Pattern’. In this section, you can define the pattern for the URLs that you want to route through a specific proxy. You can also select the proxy that you want to use for this pattern.
Wählen Sie, ob Sie die soeben eingegebene URL auf die Whitelist oder die Blacklist setzen wollen. URLs, die auf der schwarzen Liste stehen, haben Vorrang vor URLs, die auf der weißen Liste stehen.
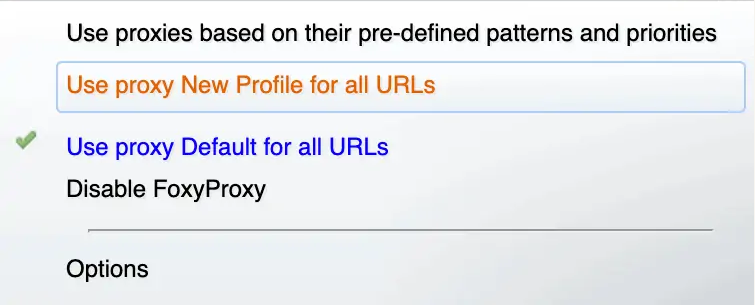
Schritt 5: Enable your proxy profile. Click on the extension icon and select: If you want to enable proxy “profile name” for all websites, use proxy “profile name” for all URLs.
Wenn Sie den Proxy für den Zugriff auf bestimmte Websites konfiguriert haben, verwenden Sie den Proxy nach vordefinierten Mustern und Prioritäten.
Schritt 6: Testen Sie Ihren Proxy. Jetzt können Sie überprüfen, ob sich Ihr Standort und Ihre IP-Adresse geändert haben oder nicht.
Das war's! Sie haben damit erfolgreich einen Proxyserver in Chrome eingerichtet!
Empfohlene Proxy-Lieferanten: Okeyproxy - Top 5 Socks5 Proxy Provider mit 150M+ Residential Proxies aus 200+ Ländern. Holen Sie sich jetzt 1 GB kostenlose Testversion von Residential Proxies!
Wie benutzt man FoxyProxy für Firefox?
Schritt 1: Download and install the extension from the Firefox ADD-ONS store by clicking Add to Firefox.
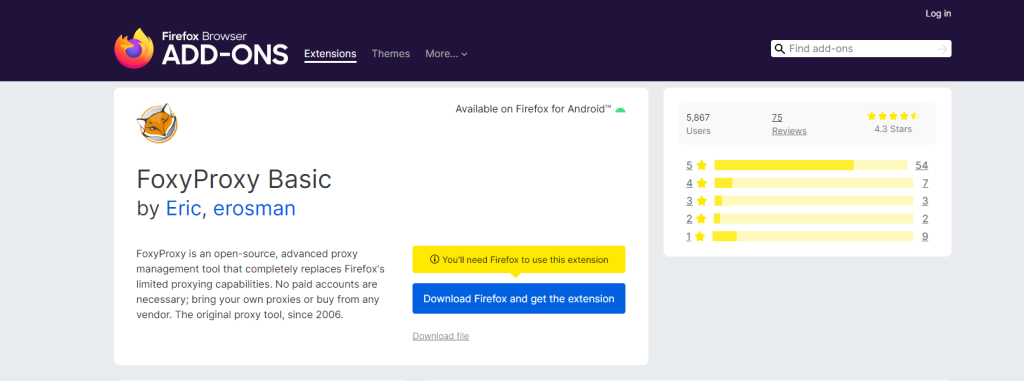
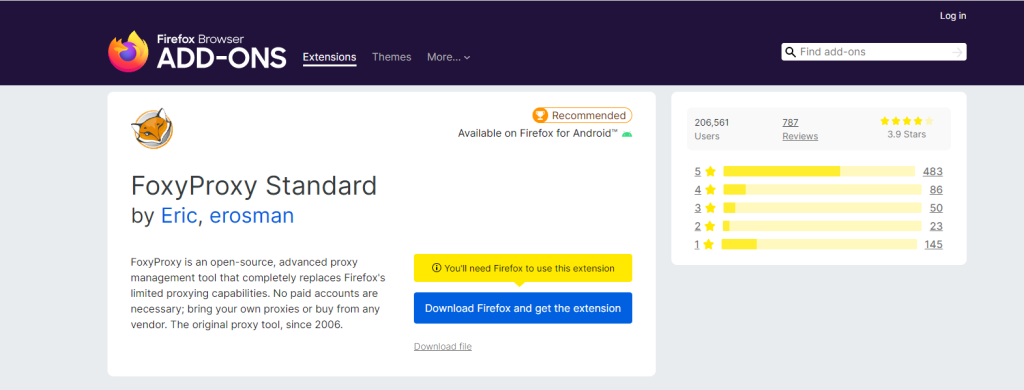
FoxyProxy for Firefox comes in two versions: FoxyProxy Basic and FoxyProxy Standard. The Standard version offers more useful features, so we will use this version in our guide. As an alternative, if you just want a proxy switcher with on/off switching, you can try the basic version.
Basic version: https://addons.mozilla.org/en-US/firefox/addon/foxyproxy-basic/
Standard version: https://addons.mozilla.org/en-US/firefox/addon/foxyproxy-standard/
Schritt 2: Wir können nun die erste manuelle Proxy-Konfiguration vornehmen. Klicken Sie in der Menüleiste von Firefox auf das Proxy-Symbol und dann auf die Schaltfläche Optionen - das Einstellungsmenü der Erweiterung wird geöffnet.
Schritt 3: Klicken Sie auf die Schaltfläche Hinzufügen auf der linken Seite, um eine neue Proxy-Konfiguration hinzuzufügen. Das Fenster Proxy hinzufügen wird geöffnet und wir müssen die Proxy-Details in die folgenden Felder eintragen:
- Proxy type
- Proxy-IP-Adresse oder DNS-Name
- Hafen
In some cases, you need to use a username and password combination for authorization. Copy the login and password values from the proxy list and paste them into the username and password fields.
Klicken Sie nun auf die Schaltfläche "Speichern". Klicken Sie dann auf das FoxyProxy-Symbol und wählen Sie die neue Proxy-Konfiguration aus - sie sollte nun aktiv sein. Jetzt können Sie überprüfen, ob der Proxy ordnungsgemäß funktioniert oder nicht: Klicken Sie erneut auf das Icon und wählen Sie What is my IP? Schaltfläche, dann können Sie Ihre neue IP-Adresse und Ihren Standort sehen.
Empfohlene Proxy-Lieferanten: Okeyproxy - Top 5 Socks5 Proxy Provider mit 150M+ Residential Proxies aus 200+ Ländern. Holen Sie sich jetzt 1 GB kostenlose Testversion von Residential Proxies!
Zusammenfassung
FoxyProxy is an incredibly versatile and beneficial tool for managing and switching between proxies. Whether you’re a developer, an IT professional, or just someone who values online privacy, it can significantly enhance your online experience. By understanding its features and how to use them effectively, you can make the most of this robust proxy management tool. You can also meet other proxy managers, read articles of SwitchyOmega, Proxifier, oder Proxy-Helfer.